Making and Using a Poultice … Even On Hard-To-Treat Areas!
May 23, 2018
Today, I’m going to empower you with several potent poultice variations to bring your herbal medicine game to the next level.
The benefits of a poultice are that it is very localized, primarily affecting the area of application, and that it allows for prolonged contact with the medicinal plant components. Tinctures and essential oils are more concentrated than poultices, but they also absorb very quickly, spreading around the whole body. Poultices are longer lasting and much more targeted.
Poultices have another advantage in that they typically have a lot of drawing power.1) This makes them popular treatment choices for objects stuck in the skin, venomous bites, stings, and contact poisons, such as poison ivy.
Are you ready to become a pro poulticer? Then read on to learn the tips, tricks, and techniques to get the most out of this powerful herbal application.
How to Make a Basic Poultice
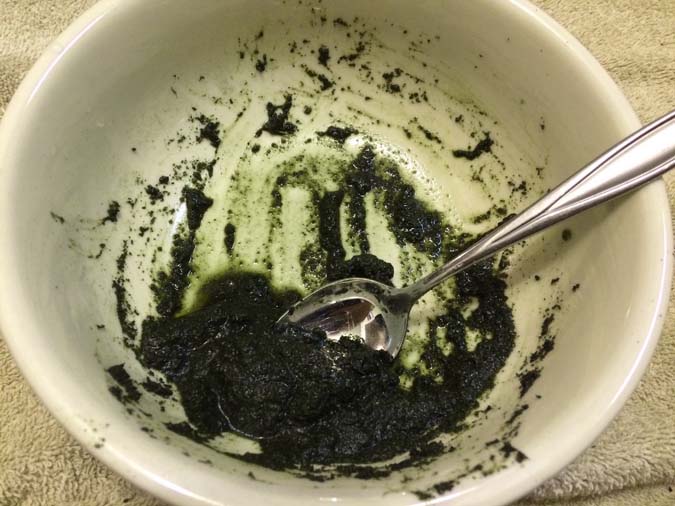
To make a standard poultice, mix dried or fresh herbs with water, stir or mash into a paste, and apply to the skin. Wrap it all up with a cloth or bandage to hold everything in place. Then congratulate yourself on a job well done.
“That’s awfully vague,” you may be saying. Well, yes, I suppose it is. But poultices are simple things, when you get down to it. They’re basically just a paste of herbs and water held against the skin. Rest assured, I will get into more details below. Check out this short video for a demonstration:
Consistency
How much water do you mix with your herbs? It’s more of an art than a science. You can find different recommendations for proportions all over the Internet, but it more or less boils down to using the “Goldilocks” method. This poultice is too dry. This poultice is too wet. This poultice is just right.
The drier you make it, the better it stays in place. The wetter you make it, the better it conforms to your body and the better the herbal constituents will interact with or absorb into your skin. You want it wet enough to spread easily, but firm enough to keep it from running.
If you’ve added too much water, add some more of the herb. If you’ve added too much herb, add some more water.
Fresh or Powdered Herbs?
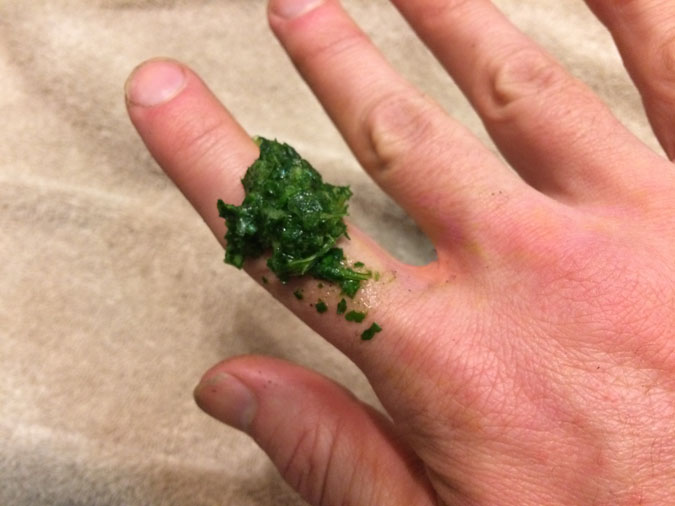
Use either. Powdered herbs are easier to work with, but fresh herbs are more potent (at least theoretically). Fresh herbs will require much less water, but will require a lot of grinding and mashing with your mortar and pestle. (Or you can just stick them in a blender.)
Using a Basic Poultice
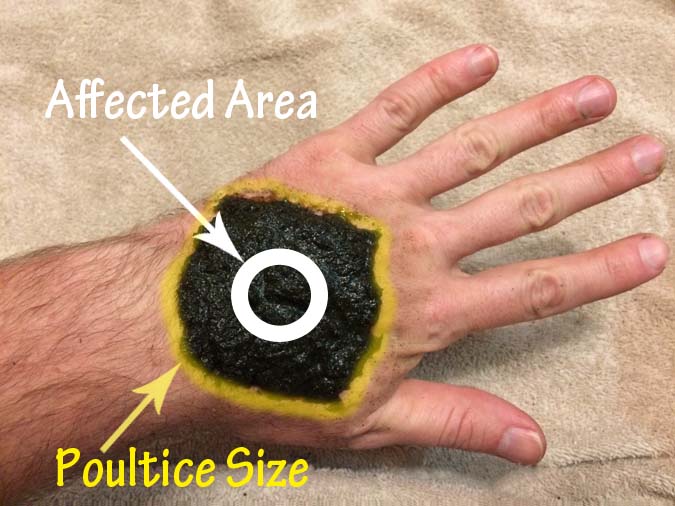
When applying a poultice, you’ll usually want to cover about twice the size of the affected area.
Again, this may vary. Size may not be very crucial when dealing with a splinter. But if I had a rattlesnake bite on my foot, you’d better believe I’d make a whopping big poultice. No point in taking chances.
(By the way, that’s exactly what Marjory did when she got bitten by a copperhead snake. She wrote about it in her book, Snakebite! How I Successfully Treated a Venomous Snakebite at Home; The 5 Essential Preparations You Need to Have.)
The bottom line is that a bigger poultice isn’t going to hurt anything, but a smaller one may be ineffective. When in doubt, go bigger.
That goes for thickness, too. You can often get away with thinner poultices for minor things, but somewhere around the size of a thick hamburger patty (or veggie burger) would be ideal.
Duration and Frequency of Use
How long should you leave it on and how often should you apply a new one? Again, you can get all manner of answers from herb books and websites.
For typical applications, an overnight poultice is a good choice. This is based on my theory that it’s a lot easier to deal with a poultice when you’re not walking around doing stuff. Repeat as needed.
Of course, poultices can be worn during the day, too. Six hours on and six hours off is a good general timing. You could also do anywhere from four hours on and four off to 12 on and 12 off.2) I like to give the skin at least half of the day free from the poultice to breath and relax.
Removal
Poultices usually come off without much trouble. However, if you had a particularly sensitive area, or just wanted to hedge your bets, you could apply a thin layer of oil to the area before applying the poultice.
What If It Won’t Stay Put?
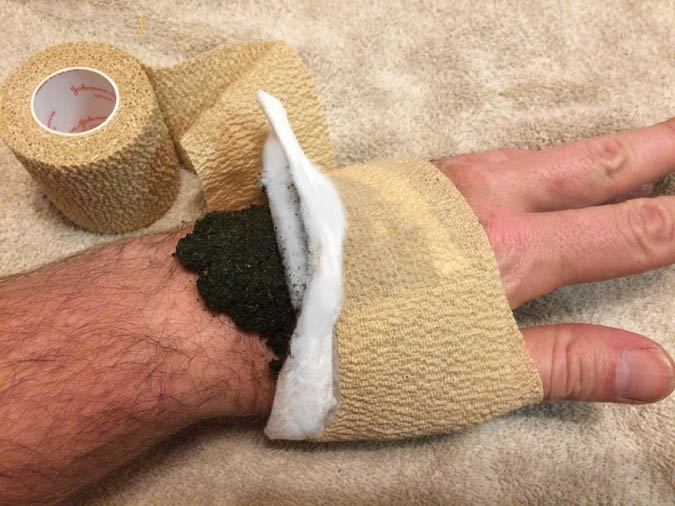
Are your herbs sliding around? Try placing a gauze pad or folded washcloth on top of the herbs before wrapping it all up. Now when the outer wrapping is bumped or jostled, the herbs will have an extra layer of insulation from movement.
Fastening Options
Remember, poultices don’t have to be fancy. A roll of duct tape works just as well as an ACE elastic wrap. Often, you can wrap the area with a towel and fasten it by tucking it back in on itself. No additional fastener needed.
That being said, sometimes getting a little fancy can be fun, too. Consider sewing a pocket into your poulticing cloth to hold those herbs in place. Another option is to sew Velcro straps to your cloth. You’ll appreciate this if you ever have to poultice your own arm. One-handed poultices can be tricky.
Super-Charged Poultices
Instead of mixing your plants with water, why not use an herbal tea or a decoction?3) This method is often used on tougher plant parts, such as roots, twigs, or bark. A decoction is similar to an infusion, but uses more heat over a longer period of time.
The benefit of using a decoction or an infusion instead of plain water is that you’ll pack twice the power into the same-sized package.
Should Your Poultice Be Hot or Cold?
Temperature can influence your poultice’s effect. A hot poultice will have more drawing power, as well as stimulate relaxation and blood flow. A cold poultice will help reduce inflammation and dull pain.
Plastic Wrap
If you’re applying a hot poultice, add a layer of plastic wrap directly over the herbs to reduce the amount of heat lost to the air. Reduced airflow also reduces cooling from evaporation.
Fomentation
Technically speaking, fomentations aren’t really poultices. They’re more like a close cousin.
Rather than applying herbs to the skin and wrapping them with a towel, a fomentation soaks the cloth directly in an herbal tea or decoction and then applies that cloth to the skin. Wrap this in a warm towel, changing as needed to keep up the heat.
You may want to add a layer of plastic wrap between the two fabric layers to keep your fomentation from soaking up into the outer layer. Heating packs can also be used, if desired.
Herbal Ice
Let’s not forget the power of ice. It cools, sooths, and reduces swelling. But why stop with plain old ice? Let’s get some herbs in there. Caution: With any of these options, a layer of cloth between your skin and the ice is advisable, to prevent any damage from the cold.
First, a note of practicality. While you absolutely can make a regular poultice and freeze it, I recommend that you make it much thinner than normal. A thin application is easier to bend, even while frozen, and is safer if you plan to leave it on for an extended time.
Another option is freezing plant juice in ice cube trays. If you don’t have a juicer, you can use your blender and strain out the pulp.
Wrap a cube or two of frozen juice in a wash cloth and hold it on the affected area as you would with regular ice. You can also crush the ice with a hammer or blender, and wrap it on your arm as a frosty poultice. It feels a bit like having a snow cone wrapped around your arm.
If you don’t have any frozen juice, you can also soak a cloth in fresh juice and stick it in the freezer for a few minutes. You might call this a reverse-fomentation. Be sure you take the cloth out before it freezes.
Weird Locations
Sometimes an area does not lend itself to easy poulticing. This may be a matter of creative wrapping, or, in more challenging cases, you may need additional strategies.
Consistency (Again)
Altering the amount of liquid in a poultice can often get it to behave the way you want. A wetter poultice will flow in between cracks and crevices to touch every bit of skin. It also penetrates hairy areas better than a thick poultice. The downside is that it tends to be messy and get into a lot of areas you weren’t intending to treat.
A thicker poultice is much easier to keep in place. It’s especially useful in difficult-to-bandage areas, where a normal poultice would tend to fall away from the skin. The downsides to a thicker mixture is that it tends to crumble if too dry, and the herbal constituents may not absorb into the skin as well.
Ear
The insides of ears can be tricky. You really don’t want little pieces of plant material lost down in there. That’s just asking for trouble. However, you do have options.
You can cover the opening of the ear with a thin fabric to prevent plant materials from falling in. Then apply a hot poultice to the ear and cover to retain heat. The heat will carry any vaporizing constituents through the air, into the ear. This tends to be most effective with highly aromatic plants.
The classic example is to take an onion slice, heat it up, place it directly over the ear, and cover it with a towel. In this case, no fabric is needed to cover the opening to the ear canal.
Mouth
You can’t exactly wrap up the inside of your mouth. But you can pack herbs between your teeth and cheek, or directly onto a tooth. This is usually done overnight, since it won’t get in the way of talking and eating.
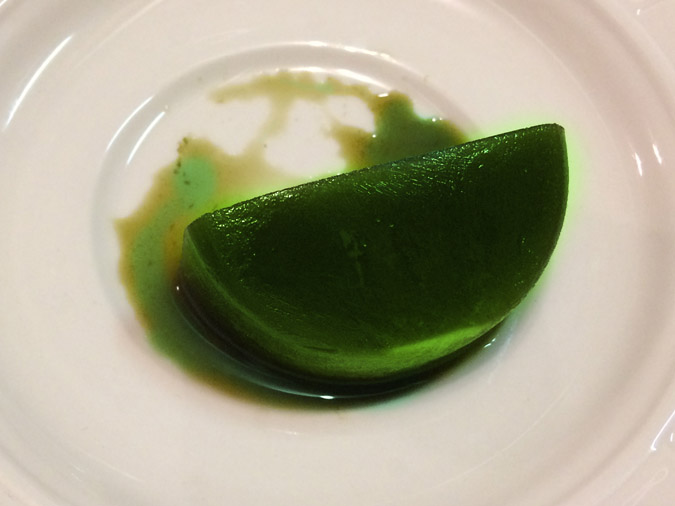
Be aware that some herbs will stain your teeth. I once used plantain in my mouth to help resolve a blocked salivary duct. It was effective, but gave me “zombie teeth” for a few days. If you’re concerned about staining, a grape leaf can be used to shield your teeth from direct contact.
A poultice can also be applied on the outside of the mouth if tenderness or other factors prevent you from placing herbs inside.
Special Applications
Spit Poultice
You won’t get to use your fun herbalist toys, but spit poultices are often just as effective as anything you’d get from a fancy apothecary. Think of it as a field-expedient poultice.
To make a spit poultice, take the plant material and chew it up thoroughly in your mouth, mixing it with your saliva. This may sound gross, but saliva speeds wound healing4) and has antimicrobial properties.5) Still, you’d rather touch your own spit than someone else’s, right? So let the poultice’s recipient do the chewing.
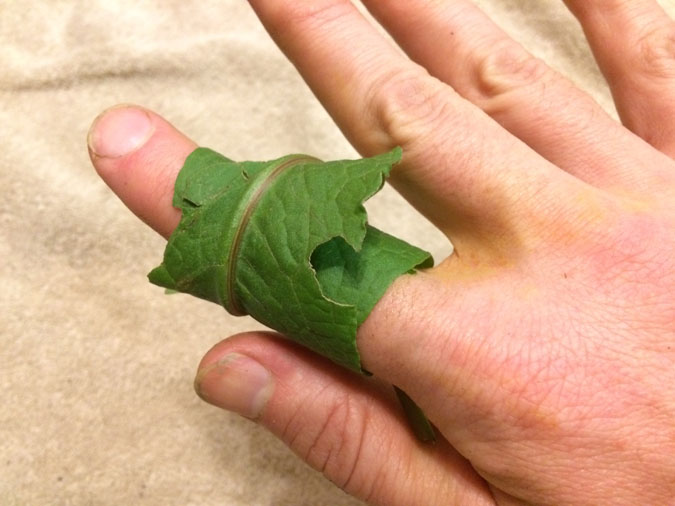
Then apply the plant material, spit and all, to the desired area. If you don’t have anything to wrap it with, you might take a strip of cloth from your shirt, use a clean handkerchief, or just hold it in place until you can find something better. If you’ve got the right plants around and a little crafty know-how, you can create a wrapping from leaves.
Adhesive Bandages
If your affected area is small enough, a simple adhesive bandage makes a super-easy poultice wrapping. It also works well to hold a thin slice of plant material in place, or to cover an area without fully wrapping it up.
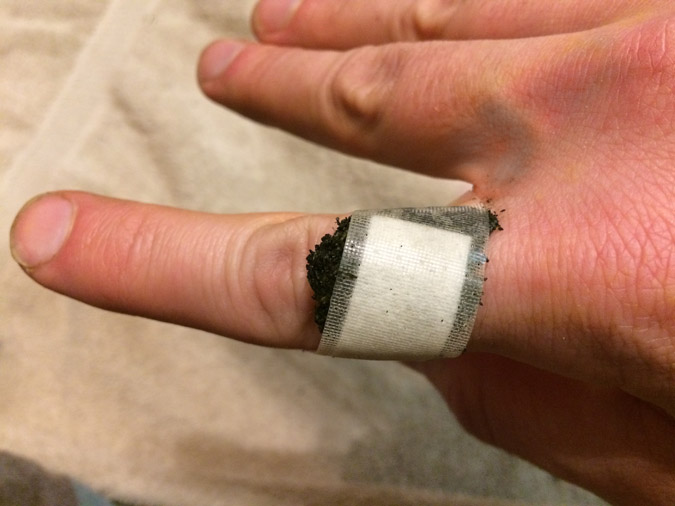
I used this method with a stubbornly infected cut on my thumb. I used a thin slice of garlic and a Band-Aid to poultice the cut overnight. In the morning, my thumb joint was a little stiff from the intensity of the garlic, but the infection was 100% dead.
Indirect
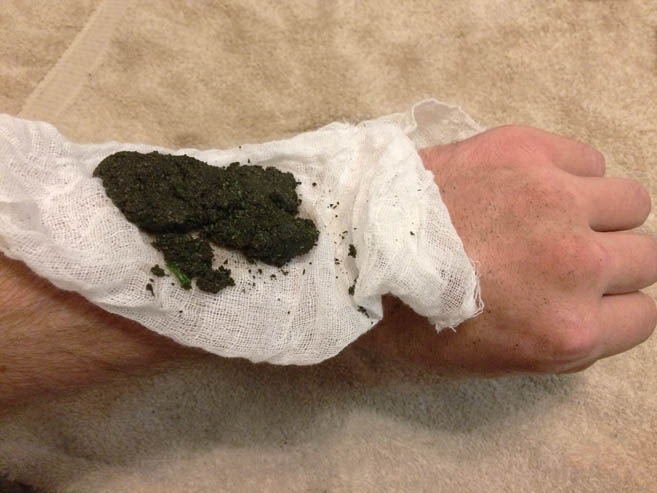
Some herbs can be over-stimulating to bare skin. In these cases, you can lessen the effect by first covering the area with a few layers of cheesecloth or a thin, clean dish towel. Then apply the poultice normally. This slows down the skin’s interaction with the herb, reducing any zingy sensations.
Beauty Treatment
We’ve all seen pictures of someone at a spa. Maybe you’ve been that person. You’ve seen the clay masks on the faces and cucumber slices on the eyes. Well, those are basically poultices without any fancy wrapping. You now have my permission to go to a spa and tell your family that you’ve got an appointment at a holistic treatment facility.
The Wrap-Up
This wraps up my discussion of poultices. (See what I did there? Because you wrap a poultice around you? No? Nothing? Alright.)
Can you think of any variations that I missed? Do you have any special techniques or tricks? Maybe a favorite poultice formula? Share them with us in the comments below, and help us power up those poultices.
No comments:
Post a Comment